![]()
Finishing
|
Finishing
your project will both protect it and bring out the beauty of the wood.
Commonly used finishes belong to basically six groups, straight oils,
oil and varnish blends, varnish, water based, shellac and lacquer.
Each have their own characteristics and application methods, all can be applied with ordinary hand-finishing methods. Pure tung oil, raw and boiled linseed oil, mineral oil and walnut oil fall into this category. These are penetrating finishes that don't build a film on the wood so they don't provide much scratch or scuff resistance, however this is an advantage on projects such as cutting boards. There is no film to crack or peel causing small bits of finish to mix with your food. Straight oils are suitable for cutting boards, butchers blocks and workbenches, they can be recoated as required. Decorative items such as sculptures and turnings that don't see any abuse can be finished to leave the wood natural looking with a matte finish. They are not suitable for articles that will be handled on a regular basis as they will collect dirt and grime. To avoid nut allergy problems use mineral oil on products that will come in contact with food, as both walnut and tung oil are derived from nuts. Raw or boiled linseed oil is often used for decorative items, or as an undercoat for other finishes such as oil-based polyurethane. Raw linseed oil can take a week to dry, boiled linseed oil has added metallic dryers that speed up the drying time. To apply oil finishes swab on a liberal amount with a rag in any direction, use a foam roller to cover large areas. Let it soak in for about half an hour, then wipe off with a cloth in the direction of the grain. With curing oils such as tung or linseed wait until the finish dries fully, then add another coat, to arrive at a sheen at least five coats will be needed. For non curing oils such as walnut or mineral oil one or two coats will do.
Click on image for more info Danish Oil falls into this category, they are made by mixing a small amount of varnish with a larger amount of a curing oil such as tung or linseed, thinning with mineral spirits and adding metallic dryers. These oils give you the best of both worlds, the protection of varnish and the ease of application of straight oil. They are not suitable for high wear items such as a kitchen table, but are excellent for end tables, beds, night tables or mirrors. Apply as you would a straight oil, but only leave on for 10 to 15 minutes before wiping off the excess otherwise the varnish ingredient will become gummy. Allow 12 to 24 hours between coats.
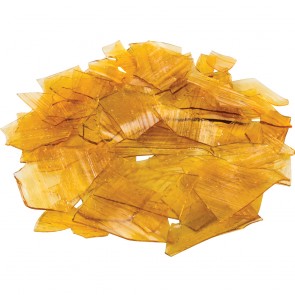
Click on image for more info Varnish is a straight oil with resin added such as polyurethane, Spar or Marine varnish has a higher oil component making it more flexible. Outdoor products have UV inhibitors added to prolong the life of your outdoor furniture. Varnish can be used on anything except items used to cut or pound on, it will crack and flake off. Wiping varnish is regular varnish thinned with mineral spirits so it can be applied with a rag to eliminate brush marks, each coat will be thinner that regular varnish so more coats will be required. To apply rub the rag in the grain direction in long strokes from one end to the other, apply as evenly as possible because you don't wipe off the excess. For ordinary brush on varnish including Spar, thin the varnish 25 to 50 percent for the first coat, then 15 to 25 percent for additional coats. Brush with long strokes, from the middle of the board to the ends. Sand lightly after each coat has fully dried with 320 grit or higher, this will give the next coat something to grip to. If the project is stained apply two coats before sanding so as not to remove any of the stain. Use wipe on varnish for the final coat. 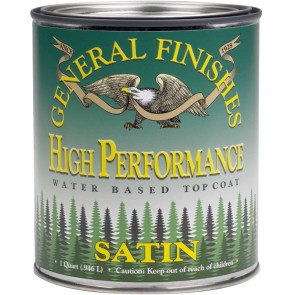 Click on image for more info These are milky white in colour and turn clear as they dry, they have excellent wear and scuff resistance and are often used on hardwood floors. Because these finishes dry absolutely clear, rather than the amber tone of oil based products, they are very suitable for over top of light stains. This is harder to apply than oil based varnish because of its fast drying time, brush on in long strokes, covering well and moving on. Sand out any problem areas later, it is usually a good idea to become proficient with oil based varnish before attempting to use this product. The basic material comes from the Coccus lacca, a scale insect that feeds on certain trees in India and southern Asia. After feeding, the insect produces through its pores a gummy substance which hardens into a protective covering called lac. This lac is collected and then it is crushed, washed and dried. After further treatment, it is skillfully drawn into thin sheets of finished shellac. Natural shellac is amber in colour, adds warmth to projects, it is sold as flakes to be dissolved in alcohol or already prepared ready for use. Apply shellac with a brush, work quickly, alcohol dissolves fast, use long strokes with the grain. Try to keep a wet edge, otherwise leave it and wait until the next coat to fill in any missed areas. Let dry about two hours between coats and sand with self lubricated 320 grit sandpaper using a light touch. Humidity may cause it to blush, so apply on a drier day or use alcohol with less water in it.
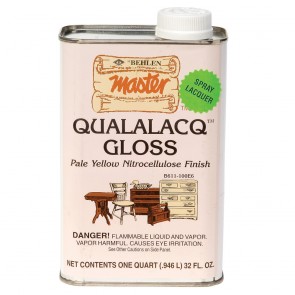
Natural lacquer is sap from the lacquer tree and is a totally natural liquid. It is semi-translucent light brown. Black lacquer is made by adding iron. Other colored lacquers such as red, yellow, green, and blue are made by mixing them with color additives. Natural lacquer ware is always "alive." The more it is used, the more beautiful and lustrous it will become. Synthetic products have been developed because once the lacquer is extracted from a tree it is destroyed. Lacquer can be applied with a brush or sprayed, be aware that there is no chemical change so the next coat will dissolve the previous coat. This has the advantage that minor scratches on furniture finished with lacquer may often be repaired by simply spraying the entire peice.
|

|
Paint
sprayers can spread paint, stains, and clear finishes faster than any
brush or roller, an added feature is their ability to apply an even
coating to uneven surfaces. Due to their ability to atomize liquid into
such a fine mist, they can create a mirrorlike finish on cabinets or
furniture where even minor brush marks are unacceptable. Air Gun Spraying HVLP (High Volume Low Pressure) Airless Paint Sprayer Finishing Supplies from RocklerSmall cracks and nail holes may be filled with a matching wood filler, apply these after the first coat of stain as they will fill the wood around the crack and it may not take the stain the same as the rest of the wood. |
|
|